Every fall I like to make a long ride before winter shuts down the riding season. Although I do ride during the winter to run errands or to take day rides with friends when the weather is dry enough, I don't do multi day trips. This fall ride was going to be a pilgrimage to one of my favorite roads, the Old Spiral Highway out of Lewiston, Idaho. It might be possible to get there and back in two days by riding a lot of freeway, but of course that is not my style. Plus, there are a lot of good roads on the way to the Good Road, and I even rediscovered one that I had forgotten was so excellent.
Here is the bike ready to go:
I left on Monday morning, not too early, because of sunlight problems that I will talk about in a moment. There were predictions for some rain moving in late Wednesday evening, which I hoped would be after I got home, but I took rain gear just in case.
One of the problems with a fall ride in the Northwest is the low level of the sun in the mornings and evenings. If you are heading into the sun and there are no trees for shade, the sun can be blinding because there is nothing like the sun shade in a car for a motorcyclist. There are various tricks, like putting electrical tape across the top of the helmet visor, but I haven't found anything that really works well. So I try to avoid leaving early when heading east, and riding late when heading west.
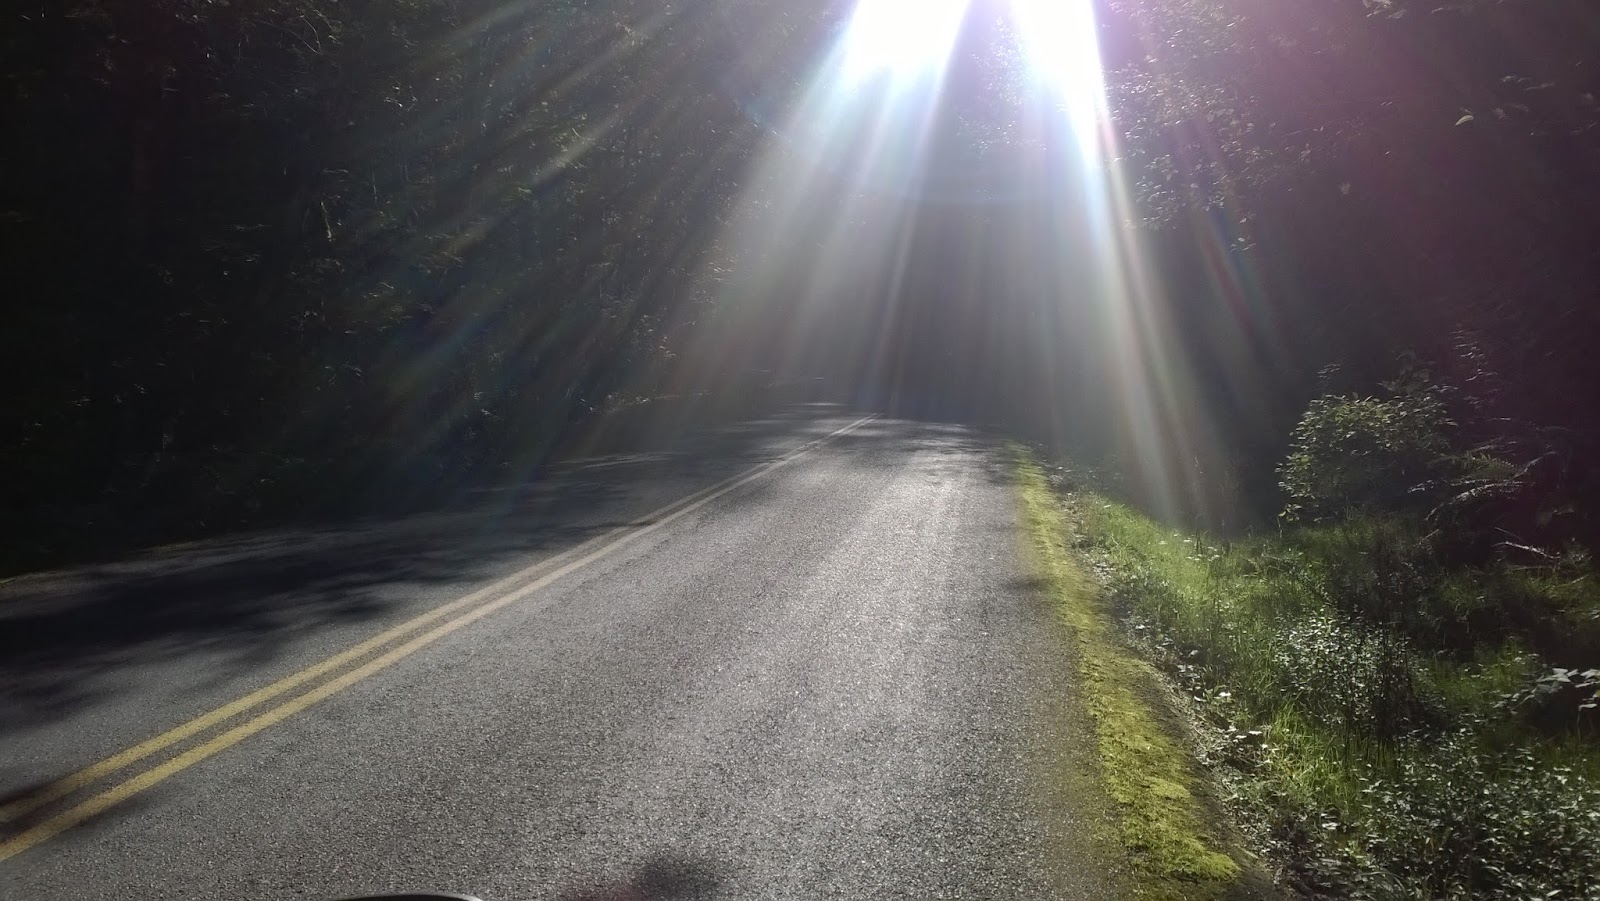
And, if you are heading into the sun, and there
are trees for shade, it can also be a problem. The forest in the Cascade mountains can be so dense that shade is really dark, and in places where the sun shines through, the contrast between the sunny spots and the shady spots is more than my eyes can deal with. Here is an example from my ride Monday morning.......this was at about 10 am:
You can see that it would be very difficult to recognize a deer in the road in the shaded area, or potholes, moss, gravel, or even which way the road turns. So I slow down a lot, and sometimes even hold my left hand out to shade my eyes.
I stopped for a break at the McCllelan overlook, where Mt St Helens was standing tall and topless waiting for the next blanket of snow:
Later in the morning I crossed the Columbia river at the town of Hood River and shortly after got on the old Columbia Gorge highway so that I could ride the Rowena Curves. This is a relatively short section of road that is popular with Portland/Vancouver area riders.
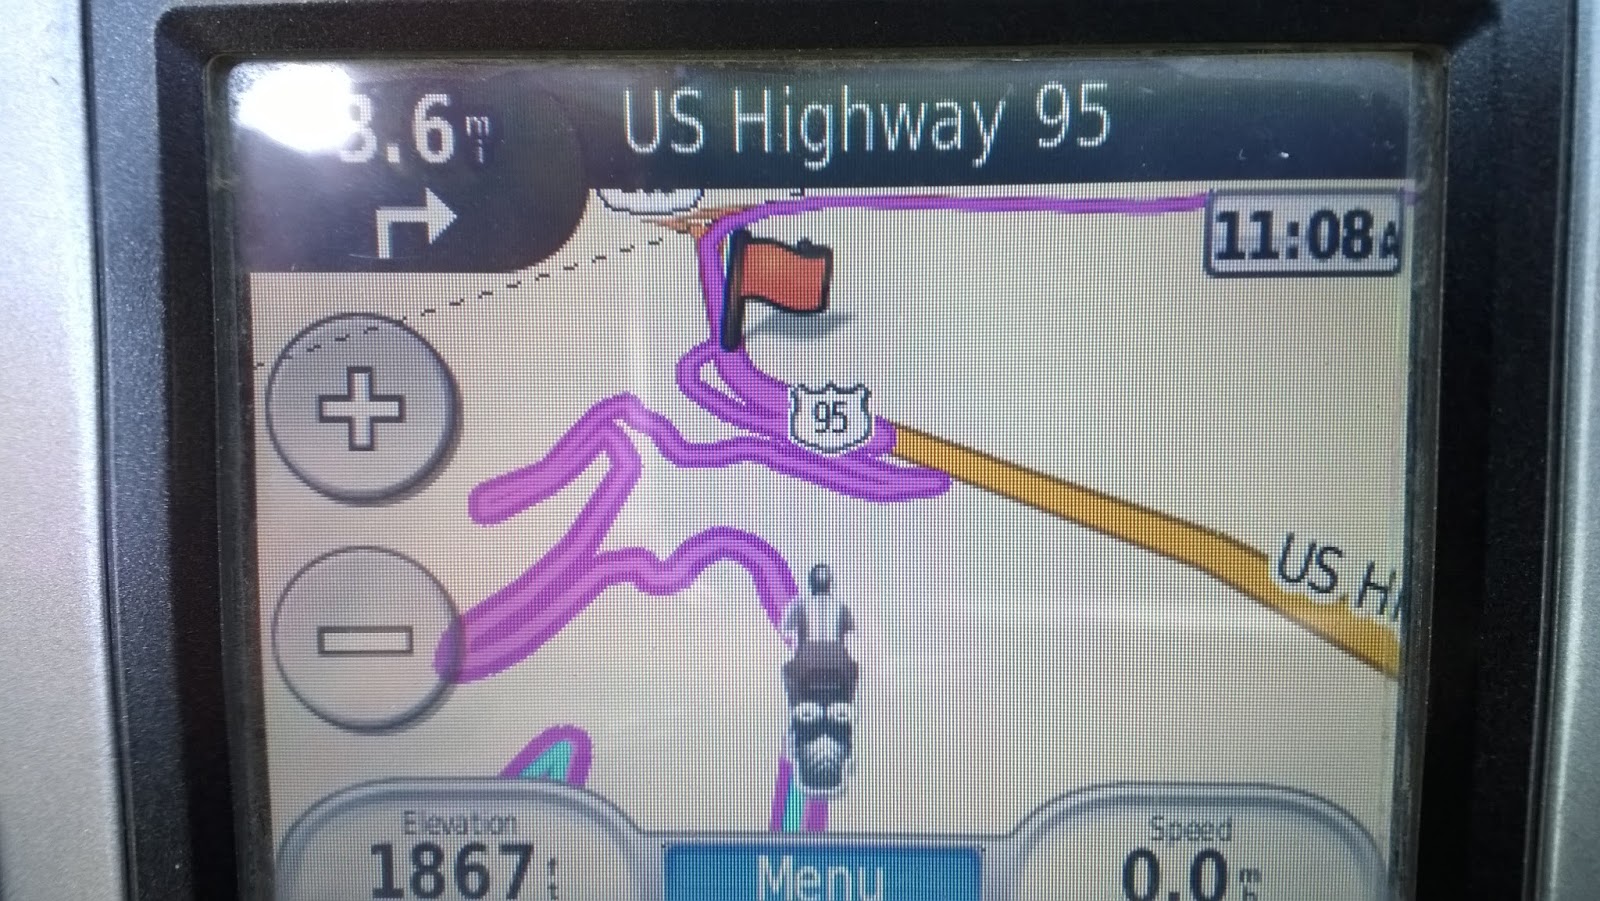
I struggle to show what makes a good road. I've tried videos and still pictures but both have their shortcomings. How about seeing what I see on my Garmin Zumo gps?
When you combine those kinds of curves, with smooth, clean pavement and no traffic, you have the definition of a
Good Road. But if you haven't ridden a good handling motorcycle at a speed that is in control, but invigorating, then you still don't know what a good road means to a biker.
Another picture:
It's a strange trend in this country that, while generally, it is getting more and more crowded, there are some places that are losing population. Usually, these are rural areas (Detroit is an exception), where agriculture has been taken over by big ag business, or where some primary resource like timber or mining has declined. You find a lot of these communities in central and eastern Oregon and Washington. Lots of vacant homesteads like this one:
Inside this old home I found evidence that it might be a hangout for some of the more seedy locals:
Patrick Henry would be turning over in his grave at what has been done to his famous quote.
I ended the first day's ride in Enterprise, Oregon; 414 miles. When riding by myself, I like to eat a big breakfast and then skip lunch. By the end of the day I am ready for a couple of beers and a full size meal at a restaurant within walking distance of my motel. This day it was Mexican food.
The next morning I headed out for the Old Spiral Highway. To get there I first had to ride up what is called Rattlesnake Grade on highways 3 and 129. I've done this road twice before......once north to south on a motorcycle, and once south to north in the Miata with Carolyn, but I had forgotten just how good it was. This ride was south to north, which I think is the best way as it is mostly uphill. Uphill always seems a little more comfortable to me, I guess because it is easier to stop quickly if you need to. Here is another Garmin shot of some of this road:
The pink road with the blue center is my track, and the straight blue line heading off to the northwest is a Garmin glitch (I didn't take flight).
Here is what it looks like in real life. Note the lack of vegetation, giving a better view around turns:
If you look closely you can see the road down in that canyon.
Shortly before noon I got to the Old Spiral Highway. This used to be the only way to head north out of Lewiston, Idaho, but now there is a major four-lane road that bypasses it. This is great, because it eliminates most of the traffic on the good road. Here is the Garmin view:
Here is another way to look at it; Google Earth:
After the Spiral Highway I headed north along the Idaho/Washinton state line, following a route I had planned in my gps. The program I use to plan these routes is Garmin Mapsource. It is an older program no longer supported by Garmin, but it is easier to use, so I stick with it. One of it's shortcomings, though, is that it does not distinguish between paved and gravel roads. So I ended up on six miles of washboard gravel like this:
Eventually I headed west back into Washington through Moscow and Pullman and got on hwy 26, which is the Palouse Scenic Byway. I stayed on this road almost all the way to Ellensburg where I spent the night. The Palouse is an area of Washington where over centuries wind blown volcanic ash has created a soil that, combined with the climate, must be perfect for growing wheat because.....there...is...a...lot...of...it. Miles and square miles of nothing but wheat. A sample:
I wondered what kind of tractor could till along such a steep side hill without rolling over. Later I saw someone actually doing it. The tractor was a tracked vehicle, which meant it probably had a low center of gravity and a wide stance. It was pulling a rake or harrow that might have been 50 feet wide.
I got into Ellensburg fairly early, but didn't have to worry about riding into the sun anyway, as it was already clouding over. The prediction of rain late Wednesday was proving to be a bit off, and now they were saying rain by morning. I stayed at the Motel 8, which I think is the third time I have stayed there; the previous two times were when riding the Washington Backcountry Discovery Route. Tuesday was 363 miles.
Shortly after I got underway on Wednesday it started raining, but I had already put on my rain gear so I was ready for it. It was pretty much rain off and on for the entire ride home. Needless to say, I didn't search out the curvy roads, but tried to stick to two lane roads to avoid the truck traffic and road spray of the freeways. I found that riding a full day in the rain was something I could get used to as long as I had gear to keep me warm and dry. The bike, however, was a filthy mess by the time I got home. The total for the ride was 1027 miles.