Wednesday, January 30, 2013

Steering Woes

Brian was down last Sunday and we tried to trace the source of the remaining steering play and see if we could do anything about it.  I had already replaced the upper and lower control arms, spring perches, stabilizer link and strut rod bushings, all the ball joints and steering linkage and the idler arm, and there was still about two inches total play in the steering wheel.  I'm pretty sure this would be unacceptable when driving the car. 

It became obvious the play was in the steering gear box.  There is some adjust ability in the preload you can put on the steering box bearings, but it didn't help.  We removed the entire steering box:


The circular thing surrounding the steering box is part of the door trim called windlace, and has nothing to do with the steering.  Note that the steering shaft goes all the way up to the steering wheel.  This was changed in 1968 when, for safety reasons, they went to a collapsible steering column.  As it is, the steering shaft was like a spear pointed at the driver's chest in a front collision.  Another good reason to install three point seat belts. 

Brian sanded and primered the outer sleeve of the steering column:


There are rebuild kits available for the steering box, but it requires some expensive tools (bearing presses and inch-pound torque wrench), and can result in steering failure if done wrong, so we decided to order a rebuilt one from a shop in Illinois. 

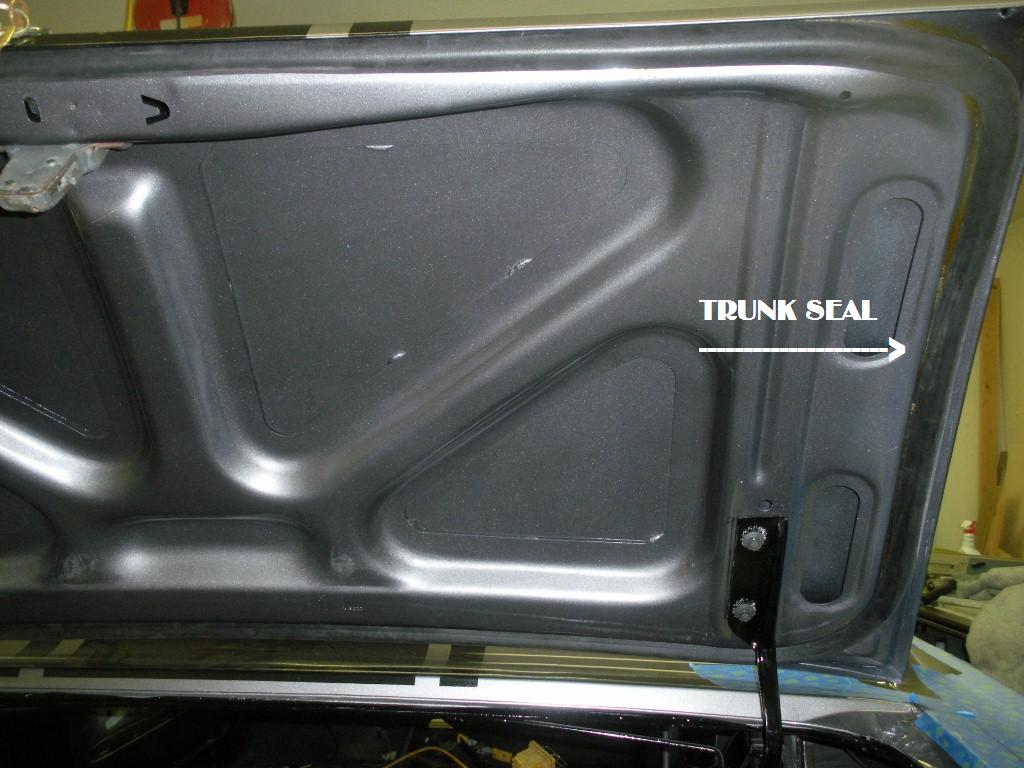
We did manage to get some other things done while Brian was here.  I finished up the driver's side door by putting in the "fuzzies" that Brian had ordered from the Mustang shop by his house.  I also bought him rear shocks for his birthday and we installed them:


I had replaced the broken spring shackle earlier. 

We also partly installed the windshield wiper motor,  but found that some gaskets were needed to install the wiper arms to the underside of the cowl, and these had to be ordered. 

Next week Carolyn and I are going to Orlando, Florida for my sister's 80th birthday and will stay for a week.  By the time I get back the steering box should be here and ready to install. 


Monday, January 21, 2013

A New Outlook

Haven't posted for awhile for a couple of reasons; one, it's been damn cold out in the shop, and two, I have had cataract surgery and have had limited activity for the past week.  I'm not supposed to lift more than 15 pounds or spend much time with my head lower than  heart level.  That cuts out a lot of Mustang work, and the temps cut out a lot of riding since the roads have been icy (this is supposed to be a motorcycle blog after all).  . 

The results of the surgery are amazing.  It was only done in the left eye, but everything is clearer and brighter.  I really don't need glasses anymore except for close-up and reading.  My right eye, which was the good one, is now the bad one.  I am looking into getting it done also.

I did manage to get some work accomplished, like working on the wheel alignment.  The front wheels have been really goofy ever since we got the car back from the body shop.  As I mentioned in the last post, part of the problem was that, without the shocks, the suspension was over-extended.  Even after getting the shocks installed, though, there was obviously too much toe-in.  I rigged up a way to do a really crude toe-in alignment by using some woodworking clamps:


Then from the front I could visually check that the clamp bars are parallel and adjust until they were:


I put the front wheels back on to get a better look at how they matched up with the rear wheels. This is a completely crude guess at what the toe-in should be, but it should at least allow us to someday drive the car to an alignment shop without wearing the tires out or being unable to drive in a straight line. The correct toe-in is only a couple of degrees and  I can't get that kind of accuracy this way.  I was really working for zero toe in.   Here are the results:


I also started working on rebuilding the heater.  After taking it apart and cleaning everything up, I repainted the metal parts and clear coated the fiberglass body.  While I was painting, I also did the fender splash guards.....three, anyway.  One was already done by the body shop.


The splash guards have rubber flashing that seals them up against the fender.  This flashing was originally stapled to the metal splash guards.  In order to staple anything to metal, you would have to have a super heavy duty stapler, and even though I have an air stapler, I don't think it would work on metal.  So one way to solve the problem is to pop-rivet the flashing on.


If one were doing a concourse-type restoration in which everything is supposed to be done like the original car was manufactured, this would not be allowed.  But with our philosophy of making it a daily driver, it works fine.

Tuesday, January 1, 2013

Family Participation

One of the Christmas presents we got for Brian was new front shocks for the Mustang.  Installing them, though, presented a problem.  The shocks act as a travel limiter on the front springs, and without the shocks in, the suspension was extended further than it normally would be.  This meant that to attach the shocks at the top and bottom, the springs would have to be compressed to match the length of the shocks.  This would normally not be a problem.......just put a jack under the lower control arm and lift it up.  However, without a motor in the car it is so light that jacking on the LCA just raised the car up without compressing the spring.  We solved the problem by having all hands muster in the engine compartment and pretend to be an engine:


That provided just enough weight that we could get the shocks attached at both ends. 

This brought the wheel, or brake disk, up into a more normal position:


Brian also brought some parts down that he got as presents from other people, and we also made a run to the local parts shop and bought some more.  One of the more tricky jobs we did was to install the trunk seal weather strip and then re-align the trunk lid.  The seal is installed using weather strip adhesive and it has to bend around the four corners of the trunk lid:


Brian installed the license plate light, the right headlight, right turn signal light, and the fog lights and wires.  For some reason we can't figure out, we had two right side turn signal buckets and no left one.  These are parts we took off the car and I have pictures that show the left one was correct, so how we ended up with two rights is a mystery. 


While Brian was installing the lights, I was trying to put some springs in the doors.  These springs fit in the hinges and prevent the door from opening too far and bending the sheet metal.  They also provide for a detente at partial door opening.  The problem is that the spring is about twice as long as the space it needs to go into and I couldn't figure out a way to compress it and fit it in.  After a couple of hours of working on it I gave up and after Brian left I got online and did some research on the Vintage Mustang forum where I got the following idea:


Closing the vice and tightening the zip ties got me a compressed spring:


Then I fit it into the door:


It wasn't quite as simple as I make it sound, as it took me most of  the afternoon, but I got it done right. 

Slowly, but surely, progress is being made.