Monday, June 9, 2014

Mustang Motor Tear-down

Brian and Colin were down this weekend and we put the Mustang away for the summer, but also got the old motor out and took it apart.  I'm pretty sure the plan is to buy a new drop-in crate motor, but I still wanted to see if the old motor was salvageable.  I also wanted to give Colin and Brian a chance to do some "wrenching" and see what the inside of a car engine looked like.  When we took the engine out of the Mustang we put it on an engine stand and it has been there in the equipment shed for the past two years.  We got it out and over to the shop and started taking it apart.  We had the intake manifold and the heads off before I thought to take some pictures, but what we found was the most caked-up engine I have ever seen.  This photo of the lifter galley was taken AFTER a lot of the gunk had been removed:


Then we turned it over and took the oil pan off:

 
Some residual coolant drained out plus more gunk:
 

Colin got to take the oil pan bolts out the old way while I used the quick and lazy way:


Next came the lower end con rod bolts:
 

Once we started taking the pistons out we were in for a big surprise; two of the pistons had broken skirts:
 

We found the broken pieces and they were intact and had not been ground into little bits, but it must have made a heck of a racket to have them rattling around in the crank case. 

Many of the bolts on the motor were quite a bit looser than I expected, especially the intake manifold and head bolts.  Maybe this engine had over heated and stretched them.  The crankshaft bolts were another matter, and it took Colin some extra effort to get them loose:
 

Once he popped a few of them loose, I showed him how much easier it was by using an air wrench:
 

We didn't actually take the crankshaft out as it was getting time for dinner and we still needed to get the cam chain off, which meant a bit more disassembly.  I will do that later, and also try to find a way to measure the bore diameter of the cylinders to see if the block can be bored again.  I don't think it can, as a crude measurement with my calipers showed it was already about 0.045 in. over and there are some scratches from those broken pistons that would have to be removed. 

The next day was Brian and Colin's day to help gram and gramps with some home projects.  The first was the removal of a tree that we had planted when we first moved in that was now so big it was shading other plants that Carolyn wanted to get more sun.  I made some partial cuts and then hooked the tractor up and pulled it over:


Then we chipped the branches:
 

And hauled off the big pieces.  That Colin is a strong kid; I don't think I would want to try to lift that log:


The next project was to help me with my firewood gathering.  I'm getting close to completing my yearly 4.5 cords, but any help is appreciated.  First we load up rounds I've cut from our property next door:
 

Take it to the wood shed:
 

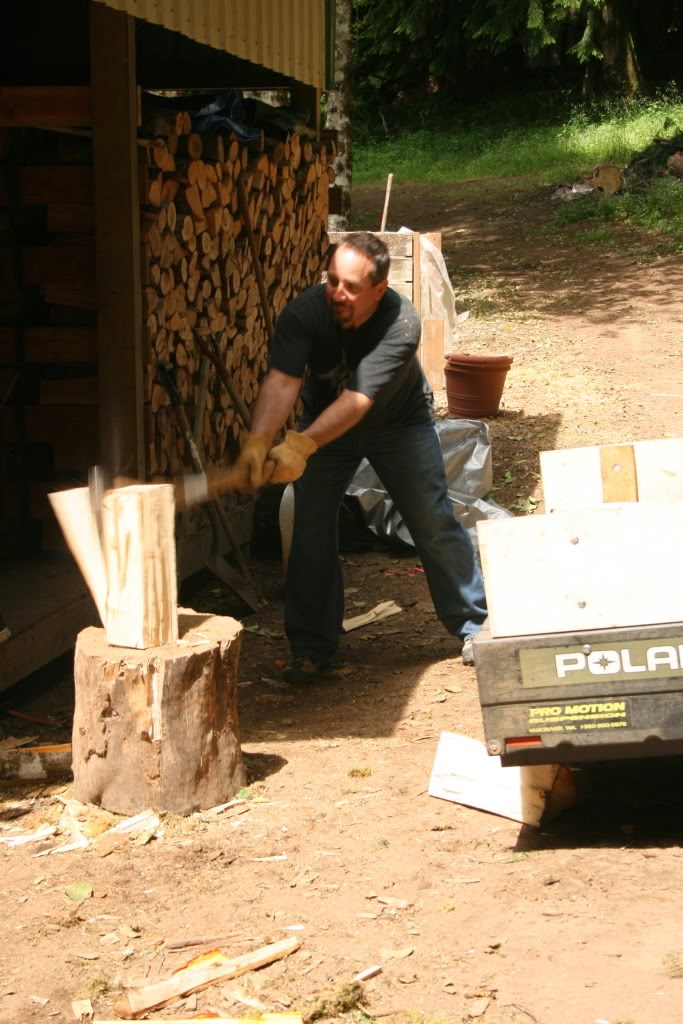
And commence splitting and stacking:


The axe man:
 

The loggers:

Sunday, June 1, 2014

It Was a Perfect Ride Until.........

Recall from earlier posts that I had fixed up a motorcycle for our daughter Jenny and we took it to her home in San Francisco.  After we left her, I hatched a plan for Carolyn and I to do a ride with her down the famous California Highway 1, along the coast north of San Francisco.  The plan was for us to meet Jen in Garberville, which is about 210 miles north of SF on highway 101.  We would spend the night in Garberville and then ride south together down highway 1 back to her house.  The only weekend available for Jenny to do this was Memorial Day weekend.  This had me nervous, since I make it a rule to not ride at all on weekends, and certainly not on a holiday weekend.  However, since we would be meeting on Saturday and riding back to SF on Sunday, I thought we would at least avoid the mad rush back into the city at the end of the holiday weekend. 

Carolyn and I had a pretty long ride just to get to Garberville, and riding two-up, we don't like to do a lot of miles each day.  So we started on Thursday, and took a route which took us over the Cascades to Central Oregon and then back over the mountains near Crater Lake and over to highway 101 at Crescent City, California.  On the first day, riding over Mt Hood, we took a little detour to Trillium Lake for the classic photo of Mt Hood reflected in the lake:


The Cascades are beautiful this time of the year (actually, any time of the year), with lush new growth and lots of water in the rivers from snowmelt. 


After our second night out, which we spent in Crescent City, we detoured again to the city of Ferndale, California.  This is one of our favorite little towns.  It has lots of restored grand old homes and nice gardens.  This is a typical house:


We got to the motel in Garberville just minutes before Jenny arrived.  Since it was too early to check in, Jen and I went for a little ride back up 101 to the Humbolt Redwoods state park while Carolyn watched the luggage and waited for the rooms to become available.  Here is a shot of a bubble-headed alien checking its cell phone:


After we got back to the motel and the riding was done, it was time to kick back and relax by the pool:


The next morning we headed down the coast highway.  Highway 1 is always an iffy proposition, since it can be very foggy and cold at any time of the year.  But we lucked out and the weather was perfect.  There was a pretty strong wind, but generally, it was at our backs, which helps reduce wind noise in our helmets.  Before this trip I had bought some upgraded intercoms that allowed for up to four-way open conversation.  We could talk to each other just as if we were riding in a car together.  It helped immensely to make us all feel connected and be able to discuss what we were seeing. 

We stopped at Fort Ross, which is a fort established by Russians in the early 19th century when the unexplored west coast of North America was pretty much up for grabs by any country.  Here are some pics of the group at the fort:


We had absolutely cloudless skies the whole way down the coast:


BUT, as we were approaching the end of highway 1 in Mill Valley, we got into heavy traffic and I was not paying much attention to the gauges and lights on my bike.  We got stopped in a shady part of the highway and the voltmeter light caught my eye as it was BLINKING RED!  I had never seen it do that before.  It meant the battery was getting seriously discharged.  I tried reving the engine, but it made no difference.  Obviously, the alternator was not sending current to the battery.  There wasn't much I could do except hope the indicator was faulty, but it was not to be, and shortly afterwards the bike quit with a dead battery.  We were 15 miles from Jen's house, but no way to get there.  Time to call a tow truck:
 

We got to Jen's house late Sunday night.  Since Monday was a holiday, no shops or even online sources for parts were open.  I spent the day researching the problem and found that there had been stator failures reported on my make and model.  The stator and the rotor are two parts that make up the alternator, but the rotor is basically just a spinning magnet and not much can go wrong with it.  I got real lucky in that Jen's next door neighbor had a fairly extensive set of tools and he and I set to taking the bike apart to get to the stator.  This is what we found:
 

Note the crispy looking coils......not good. 

In addition to not having my own tools, I really missed my motorcycle lift.  It would have allowed me to stand alongside the bike while working on it, instead of doing it like this:


By Monday afternoon I had the old stator out and the gasket surfaces cleaned.  I managed to save the old gasket. 
 

Note the garden trowel used as a wheel chock.  The garage floor was sloping slightly towards the front of the bike. 

Tuesday morning I started calling around for a stator that I could get ASAP.  It wasn't easy, but eventually I found a shop in downtown San Francisco that said they could order one and get it the next day.  As a side benefit, it was made in the USA and cost less than half what a dealer part would have cost. 

They called me Wednesday around noon, so I borrowed Jen's bike and headed downtown to get it.  The shop was a funky little place called Tokio Moto:
 

But the parts manager, Michelle, obviously knew her stuff:
 

The new stator looked a lot better than the old one:
 

I got back to Jen's, had a little lunch, and then her neighbor Joe and I started the reconstruction.  By dinner time we had it back together, including an oil and filter change which Cathy recommended was a good idea after a stator burn-out. 

Not knowing how long it would take me to get the bike running again, Carolyn bailed on Tuesday and took a plane back home as her sister Lynda was coming down on Friday for her birthday celebration with lunch reservations. 

Thursday morning I took off on the solo ride home.  I managed to get in some twisty roads that I knew of around Weaverville, CA, where I stayed the first night.  The next day I jumped on Interstate 5 and got home after 12 hours and 520 miles. 

So, it was a bit of an adventure, but a lot of things worked out well......being close to jen's house when the bike quit, having a garage to work in and tools to work with, getting the new stator so quickly, and having great weather for riding the whole time. 

Tuesday, May 6, 2014

Some Minor Mustang Bits

We had a couple of rainy days so I cleaned up a few items on the 'Stang.  First, though, this picture of Carolyn in the car showing that the seat belts fit nicely:


I  found a solution to the windlace problem.  Recall from the last post that the standard windlace was too thin to fit over the thicker ABS molded plastic headliner edge........especially around the "A" pillar where the fabric covering had a rolled edge.  I found that the original upholstery shop I went to to see about getting the standard headliner installed had an old roll of wider windlace and he sold me 10 feet of it.  It fit the "A" pillar perfectly:


To be consistent, I used it for the roof edge also, but it was a little loose in that application.  A little weather strip cement fixed that. 

I also installed the passenger side mirror.  Back when the car was new, I don't think many cars, including this one, had passenger side mirrors.  We were taught to look over our right shoulder to check for cars in the blind spot.  This was made too difficult when seat backs got the high head rests, so side mirrors became necessary.  The side mirror I installed is also convex and provides a wider field of view. 


Just a few more things to do before putting it away for summer vacation. 

Sunday, April 27, 2014

Headliner Install

Yesterday we spent way too much time installing the new headliner.  The part that I thought would be hard......getting the top part tucked behind the windshield and back window molding .....turned out to be easy.  And the part I thought would be easy.......installing the "A" and "C" pillar pieces and the windlace.....turned out to be impossible. 

Here is a pic of Brian installing the "A" pillar piece.  You can see it is tucked into the windshield molding, but the side window part has a rolled edge that was just too fat to get the windlace over.  The main top part of the headliner has what appears in the pic to be wrinkles, but they are indentations for the sun visors.  The headliner has what they call a "carbon fiber" pattern.  It might not have been my first choice, but I admit it looks pretty cool. 


One of the time-consuming tasks was to find the holes for the rear view mirror and sun visor screws.  I found them for the rear view mirror, but have not yet found them for the sun visors. 

Another job that took a lot of time was reattaching the upper seat belt brackets.  It was just my bad luck that I chose the spot for this bracket that was right at the overlap of the headliner and the "C" pillar piece, so that I had to locate the hole and drill/cut through both pieces for the bolt to pass through.  The headliner is made of fiberglass with a foam/cloth covering that was hard to get through.
Nevertheless, I eventually got it, and here is a view of the nearly finished job.  The windlace still needs to be installed above the door, but that shouldn't be too difficult as the headliner is thin in that area.  The part of the seat belt left hanging still needs to be attached alongside the front seat. 


Altogether a pretty frustrating day, but the headliner looks pretty good, and the color is a lot nicer than the original black. 

Edit:  This afternoon I found the holes for the sun visors:


The photo makes it look like the visors are grey with a black trim, but it must be some kind of trick caused by the flash.  They are really black, with no contrast from the trim. 

I also got one of the seat belts completed.  It works and fits pretty good, but makes the rear seats even more inaccessible.  I understand now why the Mustangs originally came with such thin and flimsy driver and passenger seats.  It was to help access to the rear seats. 

Monday, March 31, 2014

Busy Weekend With the Mustang

Remember in my last post about the Mustang where I said "There are still big, expensive jobs to do, but they are ....... going to be done by somebody else (carpet and headliner),...... "  Those were my thoughts, anyway, until we found out what it would cost to have somebody do the carpet and headliner.  The headliner alone would have cost over $600, and $400 of that was just to remove and re-install the windshield and rear window.  Then $225 to install the $40 headliner.  There had to be a better way, and there was.  I found online that there are a couple of shops making a one-piece textured ABS headliner that could be installed without removing the glass, and is an easy enough job for a do-it-yourselfer.  Strangely enough, the shop making the headliner that we ordered is located in my old home town of Corona, California where the Mustang spent many years.  The carpeting job we decided to do ourselves because there is an already cut-and-formed kit available for the car. 

So, this past weekend, Brian came down with his truck loaded with new parts, including new front seats and trunk carpet.  We spent Saturday afternoon after he arrived installing acoustic underlayment for the cab.  The stuff is called Dynamat, and is supposed to provide a great improvement in keeping down engine and road noise as well as providing a moisture barrier.  It had to be cut and fit to the curves of the floor, driveshaft tunnel and rear bulkhead:


I thought this was a pretty tedious and time consuming job, but the next day we tackled the carpet, which turned out to be the really difficult and time consuming job.  We sort of expected it to fit perfect by just laying it in, but it had to be trimmed a lot and the holes needed for the seats bolts, shift lever, and seat belt bolts were difficult to cut.  where possible, we located the holes by poking up from the bottom with an awl.  First came the rear section of carpet:


Then the front, plus the seat frame adapters:
 

The original rear seats, which were in really good shape, were cleaned up:


Then the sill plates were installed:


Then the front seats, which took a lot more bending and fitting of hardware than expected:


Note sexy floor mats, too. 


By this time we had been at it non-stop from 8 am to 3 pm.  We rolled it out into the driveway for a photo op:


And a test fitting:


That car is SMALL.  Brian couldn't even get into the back seats but I reminded him that he spent a lot of time there when he was a kid.  The side supports on the drivers seat, combined with the steering wheel, make it a bit of a squeeze to get in for driving.  Once in, though, the seats are very comfortable. 

There are two more interior items to install; the headliner and a console between the driver and passenger seats.  These are back ordered and are not to be shipped until late April, so in the meantime, the Mustang is taking a nap.  I need the shop space as my own vehicles are in need of some maintenance.